
How to Make Half Rectangle Triangles
Can I admit something to you today? I’d never made half rectangle triangles (HRTs) before about a year ago. I’d never really seen them before either…or maybe I’d seen them but hadn’t really registered how that particular block element was made.
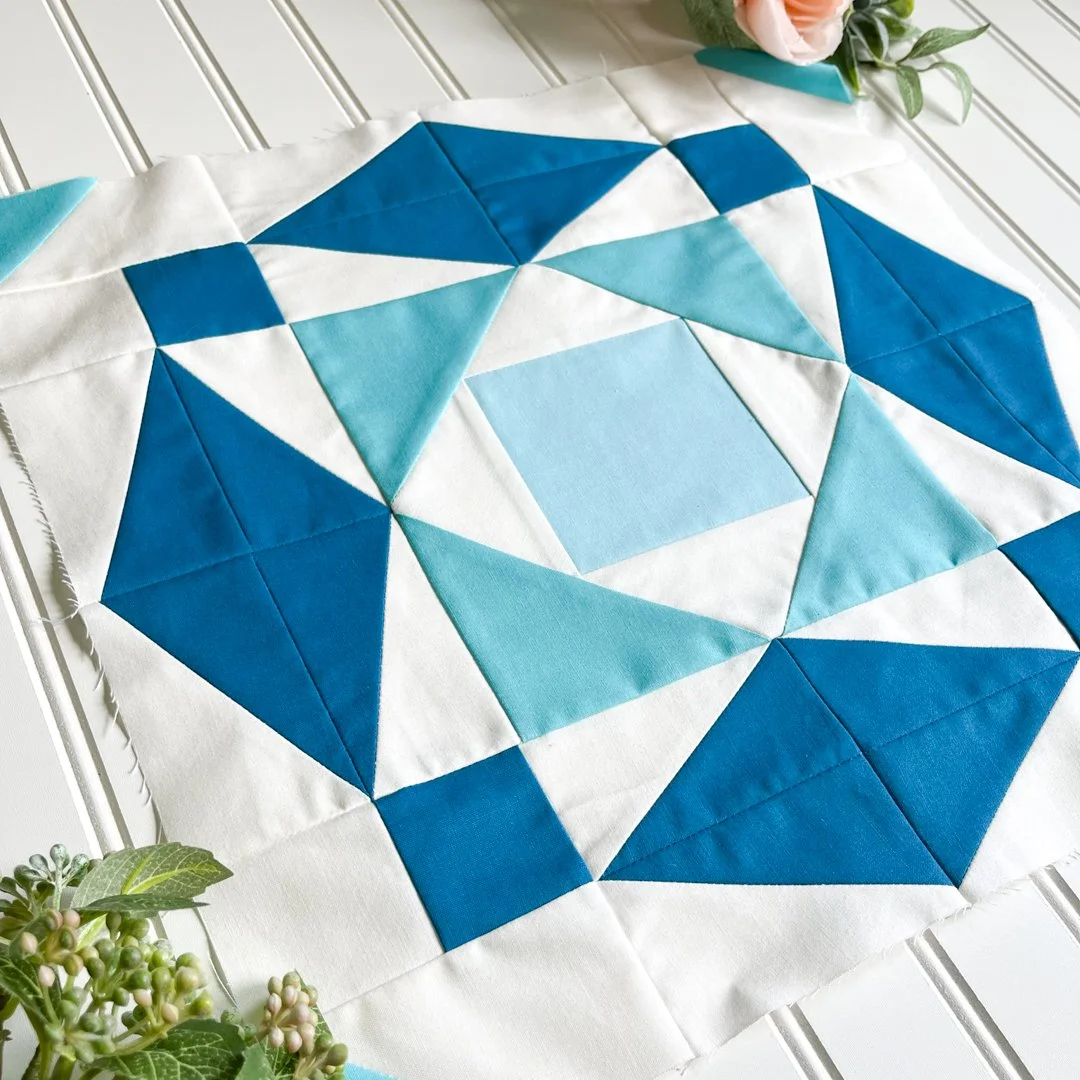
The Crystal Rose quilt pattern includes plenty of opportunity to make half-rectangle triangles. Each of the diamonds you can see in the blocks is composed of four half-rectangle triangles. Today on the blog I will show you how to make them so you’re ready to go when the time comes to make your Crystal Rose quilt!
Whether you’ve made a million HRTs before or the Crystal Rose pattern will be your very first time, here you’ll find my best tips, tricks, and tools to make half rectangle triangles easier to understand and easier to make.
Note: This post may contain some affiliate links, which means I may receive commissions for purchases made through links in this post at no additional cost to you. The only products linked here are ones I truly love and use myself. Thank you for supporting Wild Plum Lane!
Want to stay organized as you plan your week and make your quilts? Sign up to receive a FREE Quilter’s Weekly Planner PDF printable today…then get started with the Crystal Rose quilt pattern!
HOW *NOT* TO MAKE HALF RECTANGLE TRIANGLES (HRTs)
But first…let’s start with what NOT to do! (With some real-life embarrassing stories and examples from my own trial-and-error experiments!) If you’d prefer to just get right down to it, skip down to the “What you need to make Half Rectangle Triangles (HRTs)” section.
When I first started writing the Crystal Rose pattern, I thought I’d snowball the corners of each rectangle block to create a diamond, just like you can snowball the corners of a square. I figured out all the math, drew a diagonal line between the two opposite corners of my corner rectangles, and confidently sewed right down that line. I laughed so hard at myself after trimming and flipping the corner out to reveal…a total disaster (below, left)! (If you can’t laugh at yourself as you learn, you’re taking quilting waayyyy too seriously!) Those angles are darn tricky!
So…back to the drawing board. I sent a photo to my friend Carrie at Lifting Limits Quilting - so she could laugh alongside me, of course - and like any good quilty friend she helped me brainstorm my next move: make the diamonds from four half-rectangle triangles. She’d just included HRTs in one of her latest patterns, the Cultivating Quilt Pattern (the pattern includes access to an outstanding HRT-making video!), and it seemed like a great idea.
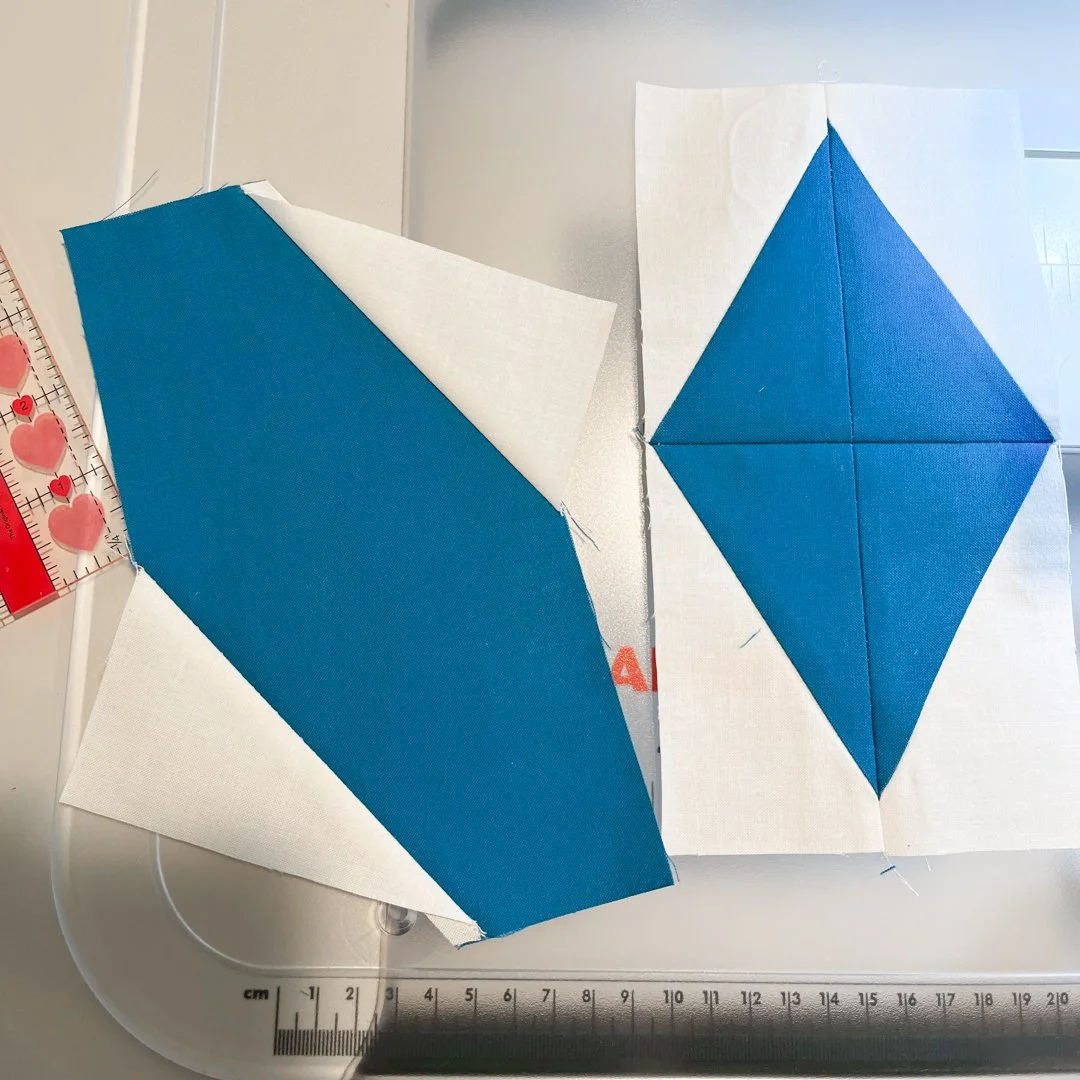
I figured out all the math again, cut the right size fabric rectangles, sewed the seams, and then trimmed directly from corner to corner…because that works for half SQUARE triangles, so why not the same for half RECTANGLE triangles?!
Wrong again! My diamond seams turned out to be both smaller than ¼” on the sides and also larger than ¼” on the ends (see photo above, right). After sharing my blunders once more, Carrie patiently explained that, due to the angles of the HRT *not* being exactly 45 degrees, the trimming is key to making sharp points as you assemble half-rectangle triangles into any kind of quilt component.
Third time’s a charm! With some lessons from Carrie and a bit more experimentation, I finally nailed the HRTs needed for the diamond sections of the Crystal Rose quilt blocks. With all the trial and error that went into this, I was truly elated when everything turned out just right and wanted to share the techniques with you!
Whether you’ve never made HRTs before or you’ve made them and it’s been a while, it’s always a good idea to practice. Pull some fabric from your scrap bins today and work alongside me in the steps below to make your own half rectangle triangles!
WHAT YOU NEED TO MAKE HALF RECTANGLE TRIANGLES (HRTs)
Today we will make a common size of half rectangle triangles, 2” x 4” finished (2.5” x 4.5” unfinished), and will make two HRTs in each direction. This method will leave plenty of room for trimming. Once you’ve made a few, if you’d like to change the size of the starting rectangles, you are welcome to do what works best for you.
WHAT YOU’LL NEED:
(2) 3.5” x 5.5” light colored fabric rectangles (use those scraps!)
(2) 3.5” x 5.5” dark colored fabric rectangles
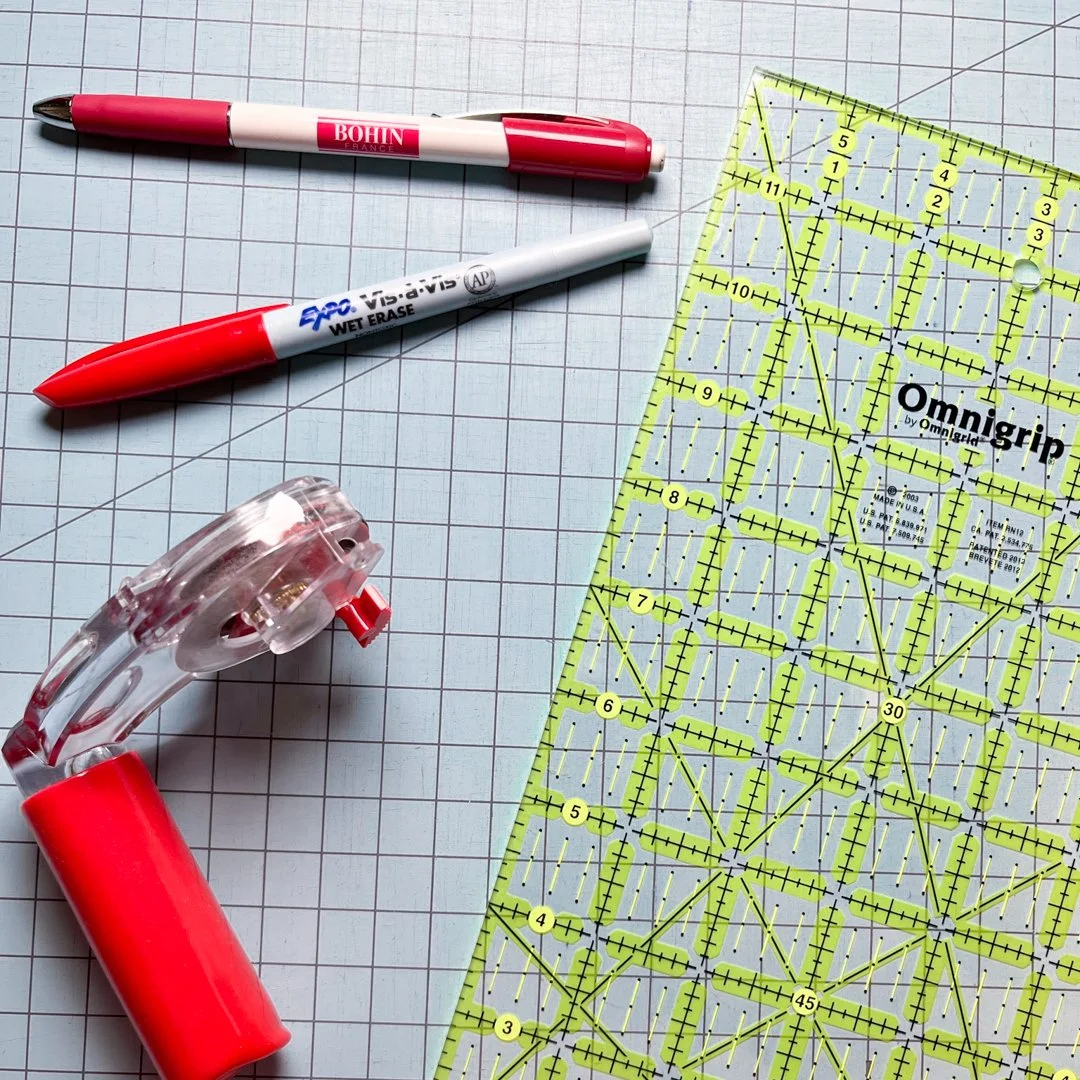
Quilting ruler at least 2.5” x 4.5” in size with marks every ¼” OR Bloc-Loc Half Rectangle Triangle Rulers (They can be expensive, so shop around! Find them on Amazon, Fat Quarter Shop, Missouri Star Quilt Company, or at Bloc Loc)
Cutting mat
ABBREVIATIONS
RST = Right Sides Together
HRT = Half Rectangle Triangle
HALF RECTANGLE TRIANGLES, STEP 1
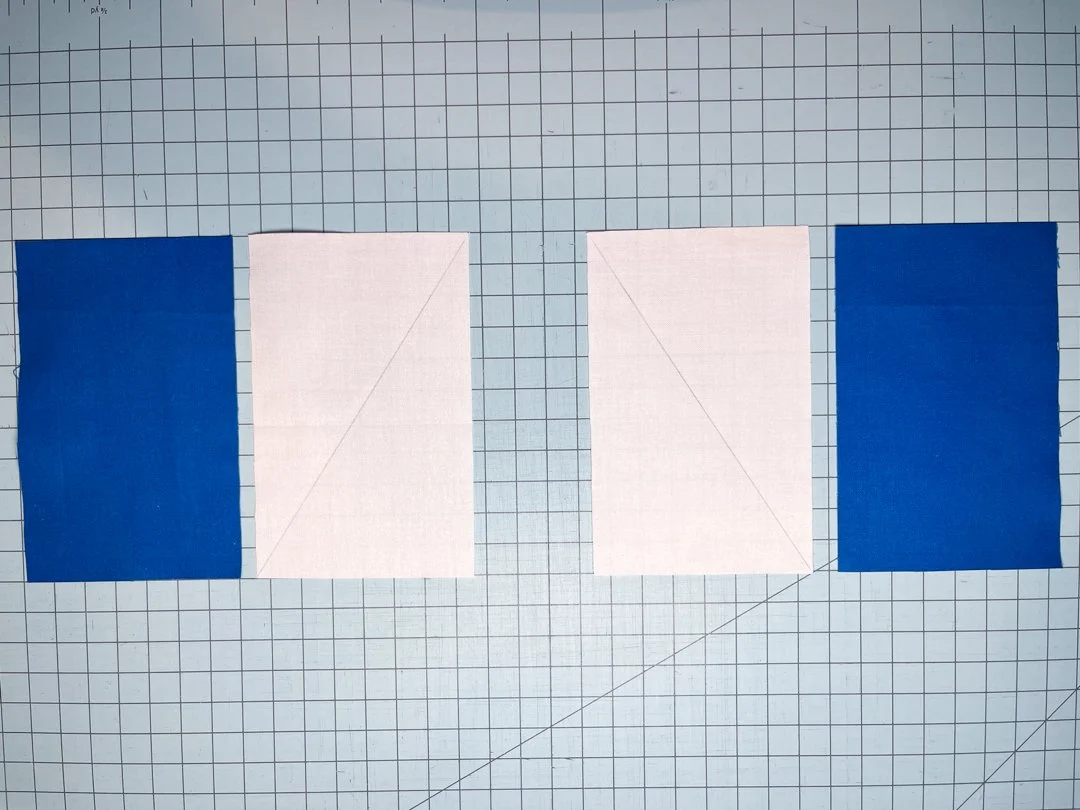
On the back side of (1) light colored rectangle, draw a diagonal line from the top right to bottom left. On the back of the other light colored rectangle, draw a diagonal line from the top left to bottom right. They will look like the image shown below.
HALF RECTANGLE TRIANGLES, STEP 2
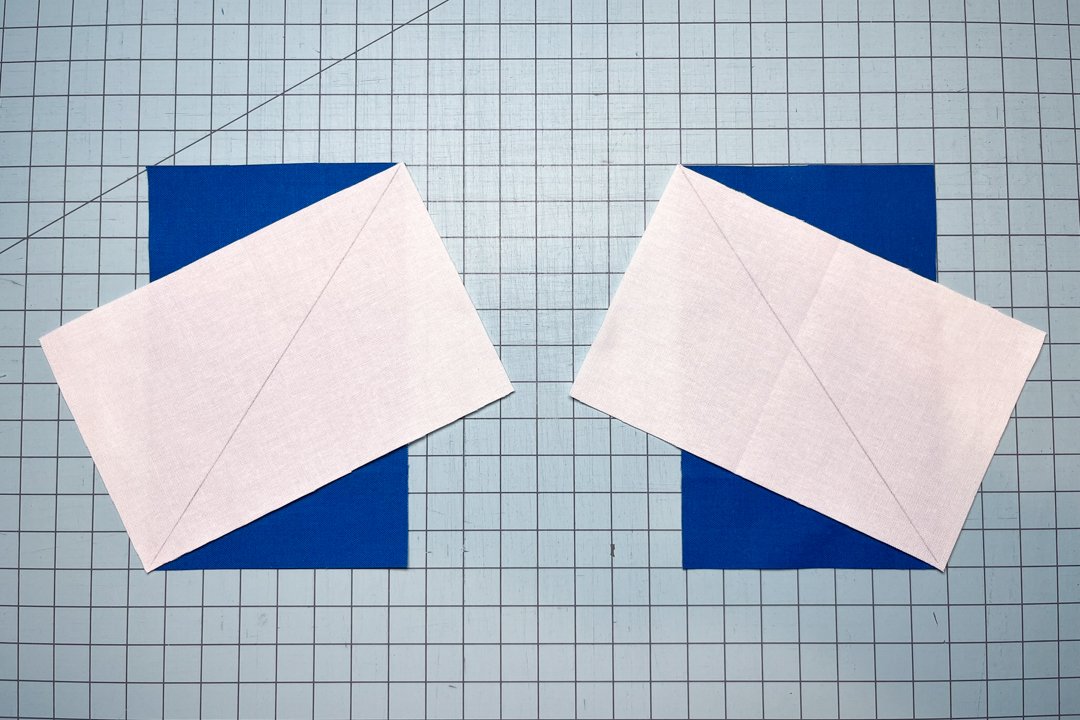
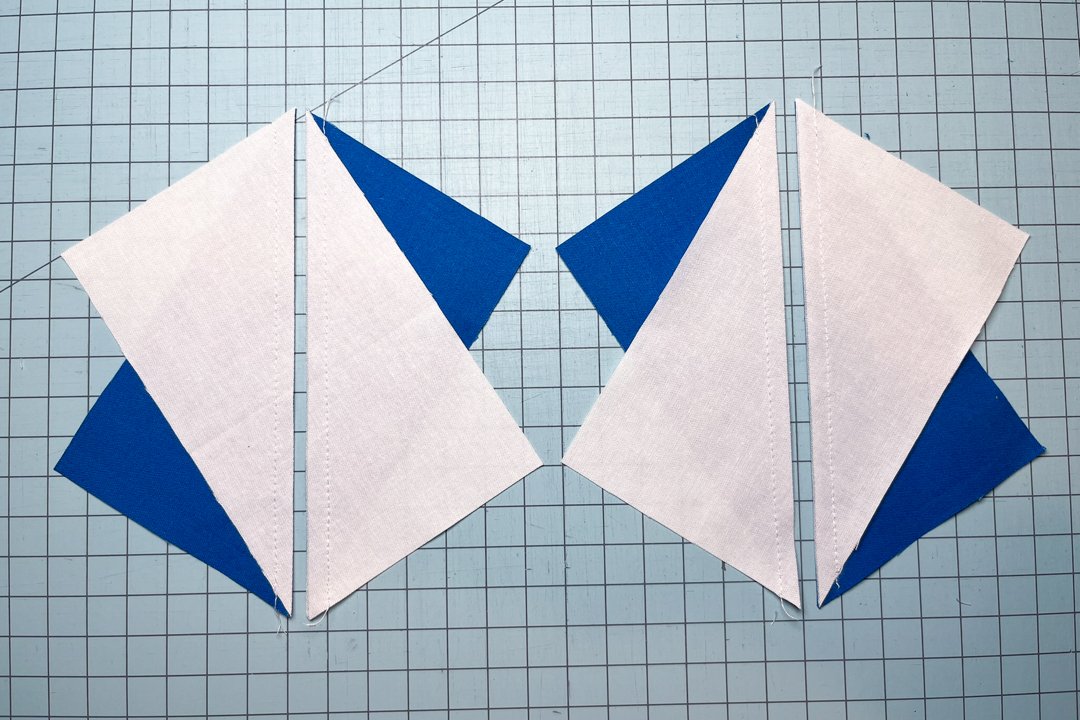
Here’s the first tricky part! With RST, align the top left of the light colored rectangle with the top right of the dark colored rectangle. The bottom right of that light colored rectangle should align with the bottom left of the dark colored rectangle. See below, right, for reference. Do the opposite with the second set of light and dark colored rectangles, as shown below.
HALF RECTANGLE TRIANGLES, STEP 3
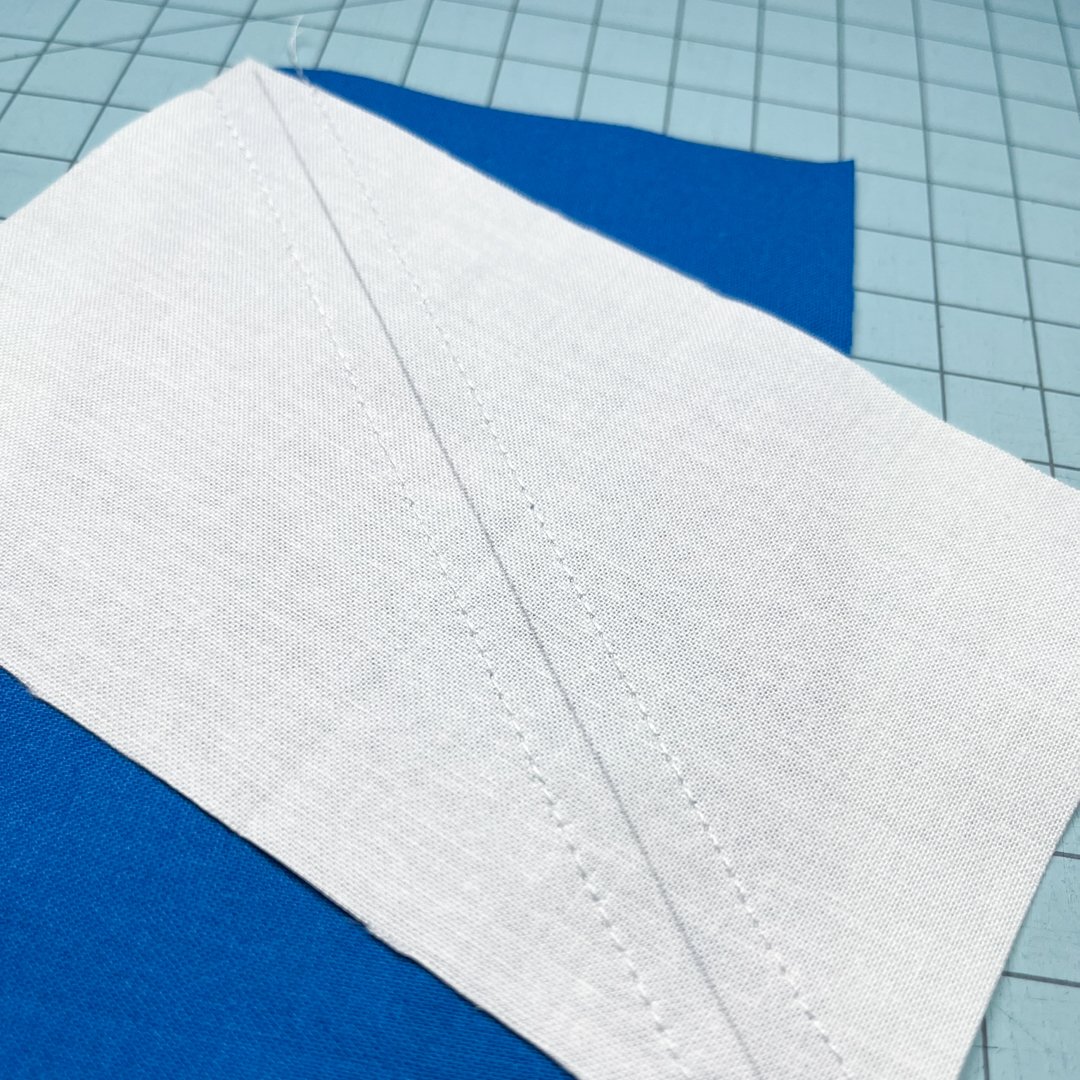
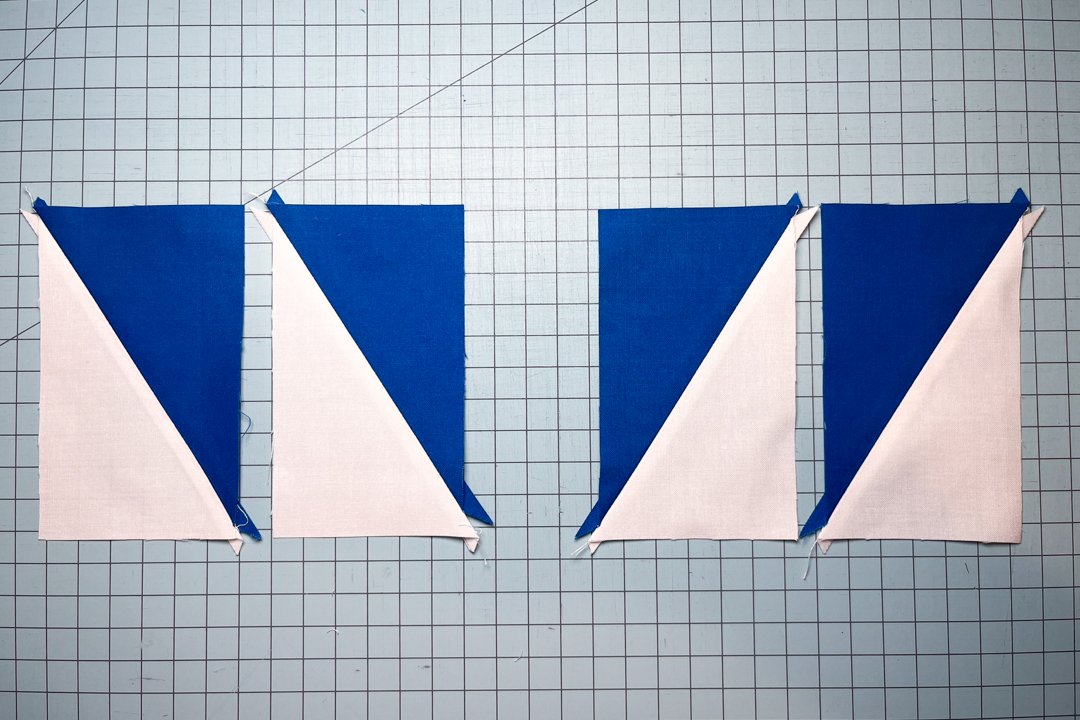
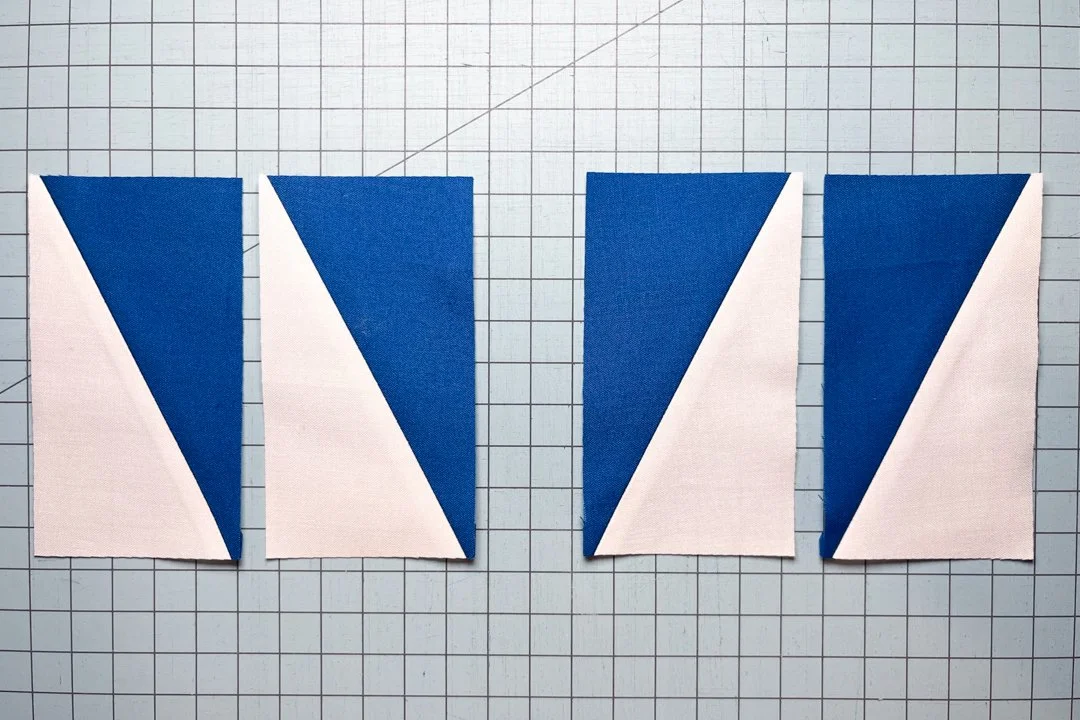
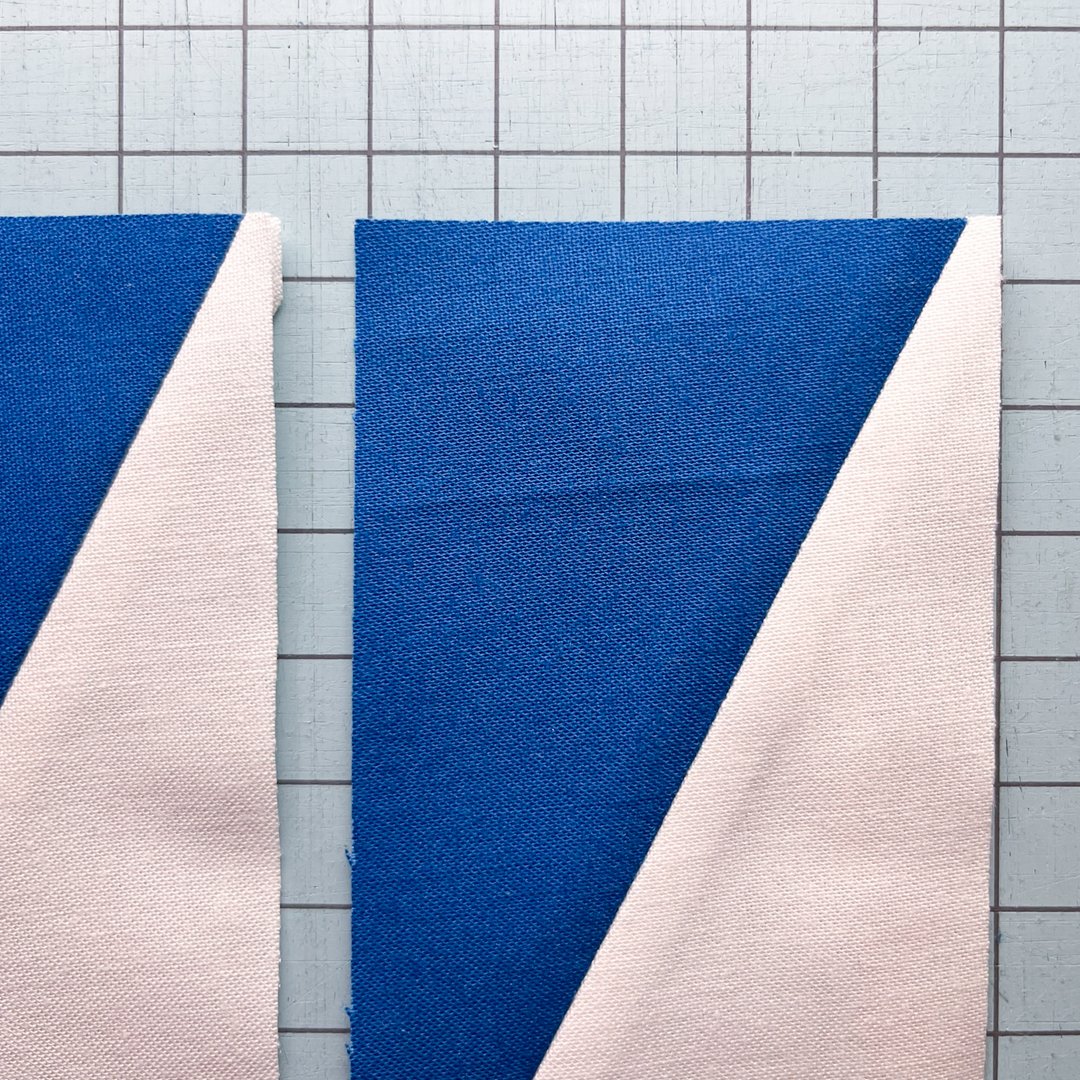
Sew a ¼” seam on either side of the lines, then cut along the drawn line to create a total of (4) pieces, (2) HRTs from each set of light and dark colored rectangles. Press seams open or to the side, whichever you prefer (or according to pattern directions).
TRIMMING HALF RECTANGLE TRIANGLES WITH A STANDARD QUILTER’S RULER
Next, let’s set up your quilter’s ruler for trimming. If you have the Bloc Loc rulers, skip on down to the “Trimming Half Rectangle Triangles with Bloc Loc Rulers” section.
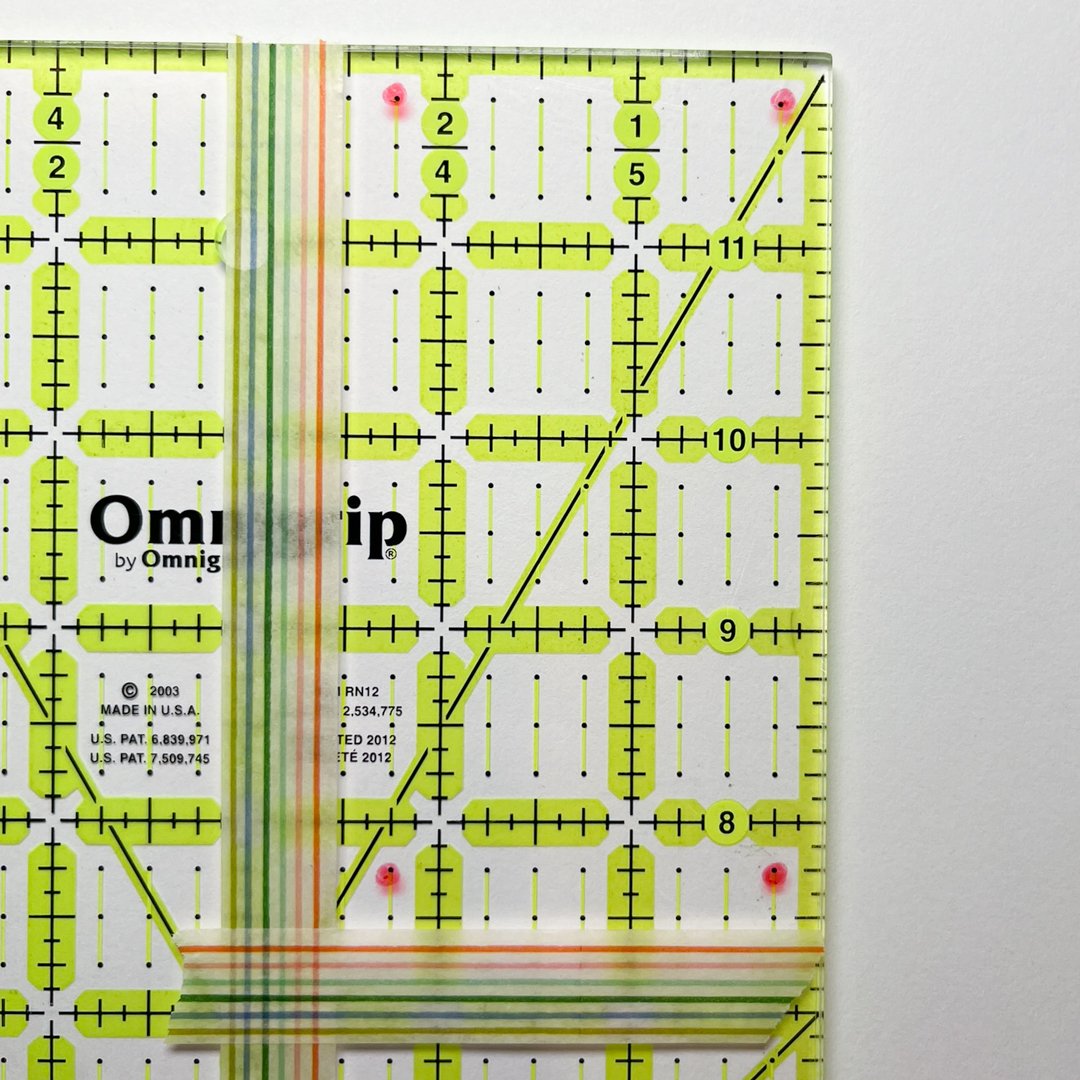
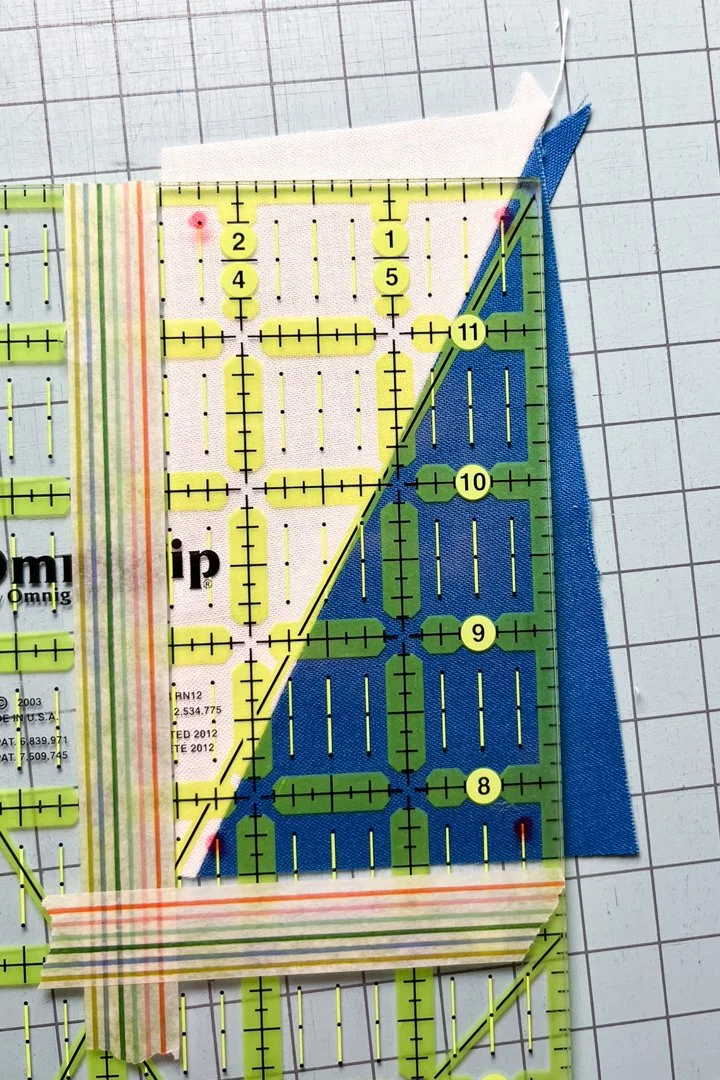
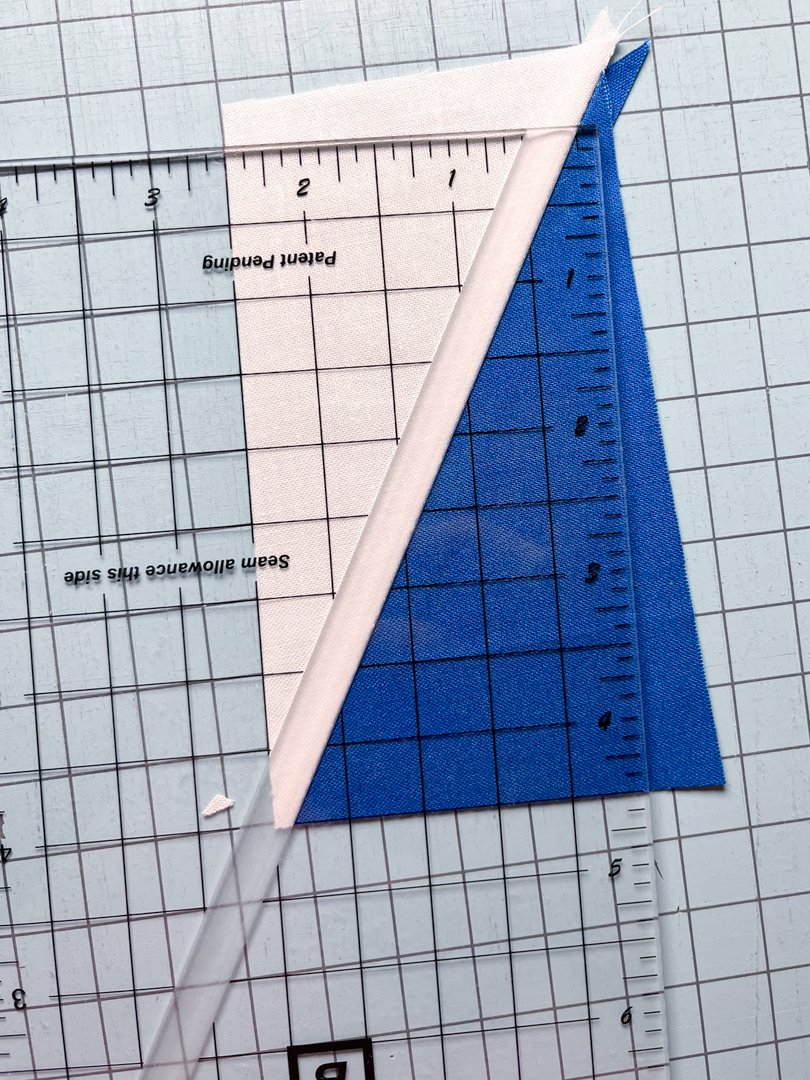
First, let’s mark the 2.5” and 4.5” lines on the ruler at the top right (or you can switch this to the the top left if you’re a lefty!). I like to use either painter’s tape or washi tape, as shown below.
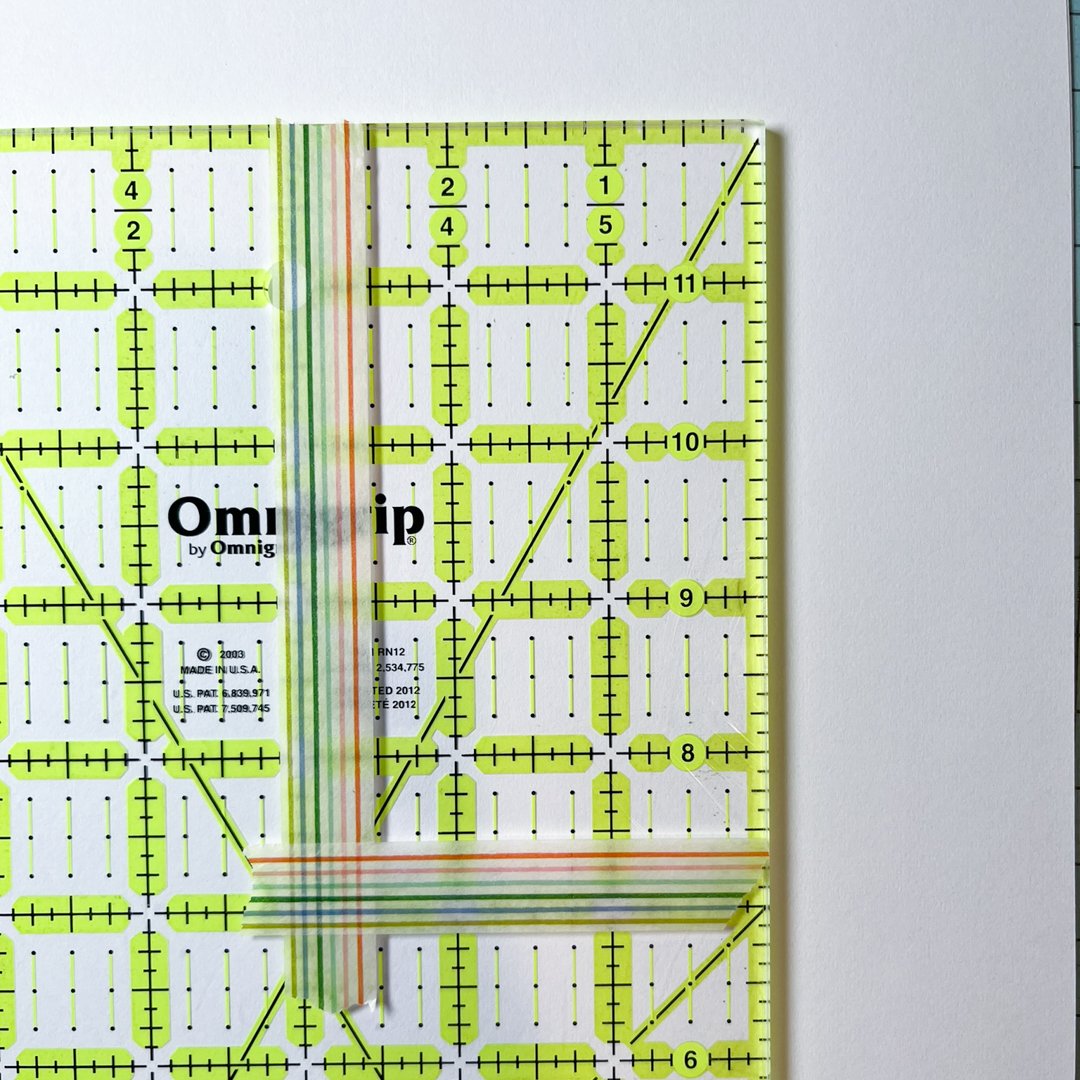
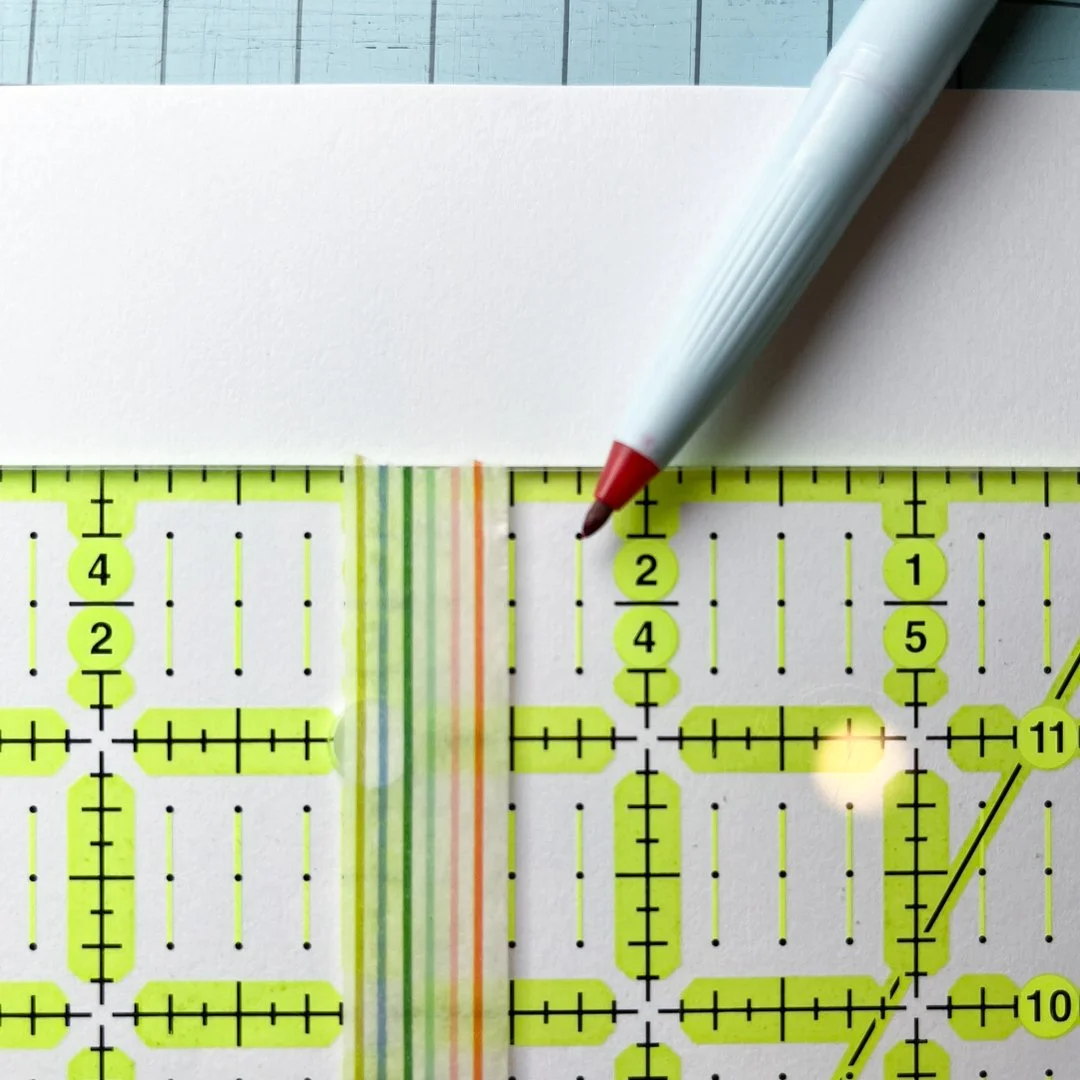
This next step is important: Find the mark that is ¼” in and ¼” down from the corners of our marked 2.5” x 4.5” rectangle. While optional, I like to mark these with a wet erase marker so they can easily be found by my eyes as I trim, or dry erase markers will work too…just use what you’ve got on hand. I’ll refer to these as “alignment marks” throughout the rest of this section. Marks from wet erase markers will stay in place as you work/move the ruler. If you use dry erase, you might need to re-mark a few times as you work!
You’ll mark at the following locations on your ruler:
¼” x ¼” (for top right to bottom left HRT)
2 ¼” x 4 ¼” (for top right to bottom left HRT)
2 ¼” x ¼” (for top left to bottom right HRT)
¼” x 4 ¼” (for top left to bottom right HRT)
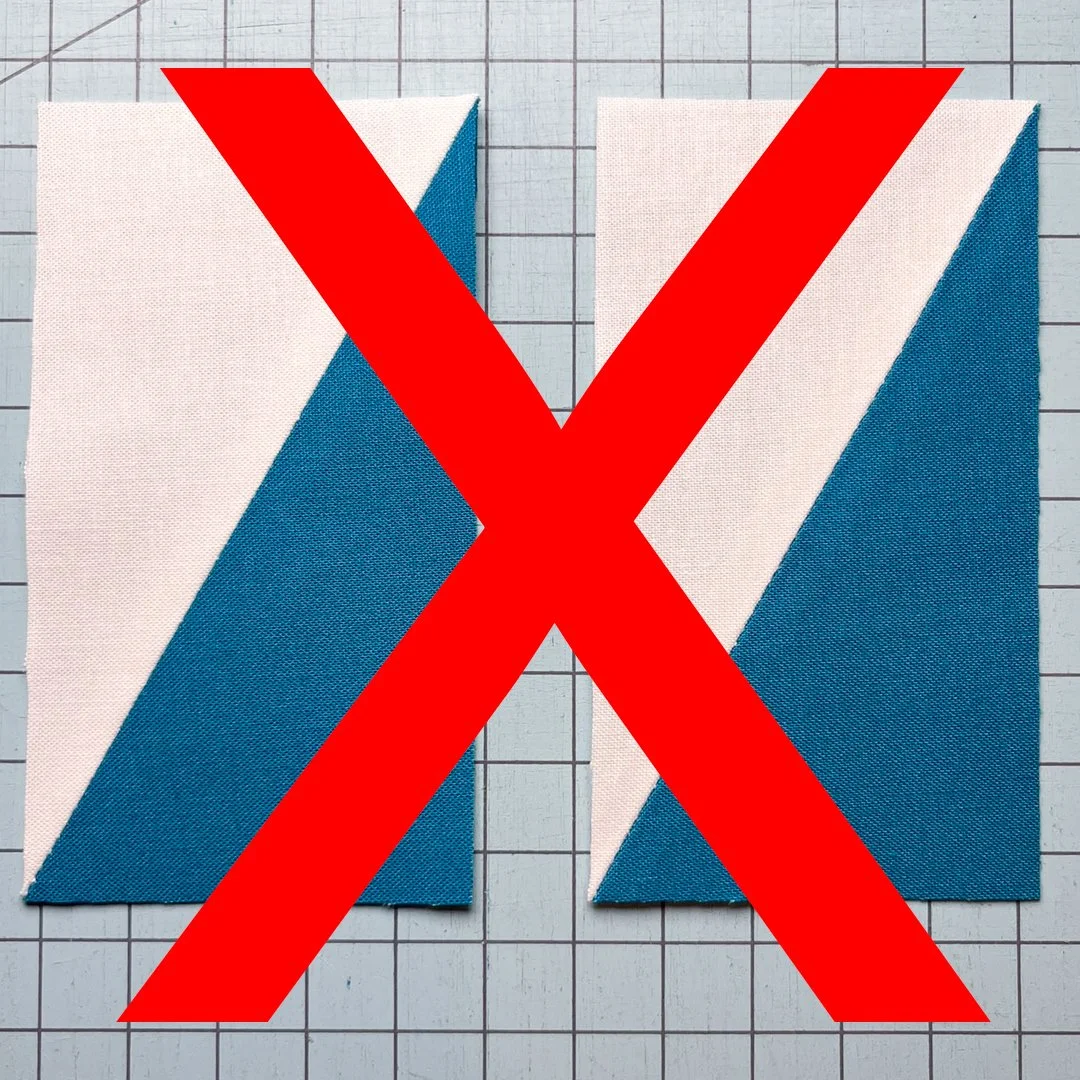
To trim, first line up the corners of the 2.5” x 4.5” marks on your quilter’s ruler with the diagonal seam of the HRTs. You’ll notice that the marked ¼” alignment marks are not aligned with the seam. This is a problem because if you trim with the seam exactly on the corners, when you begin to sew these HRTs together using a ¼” seam, the points won’t fall precisely on the corners, as you can see in the close-up photo. Let’s fix that.
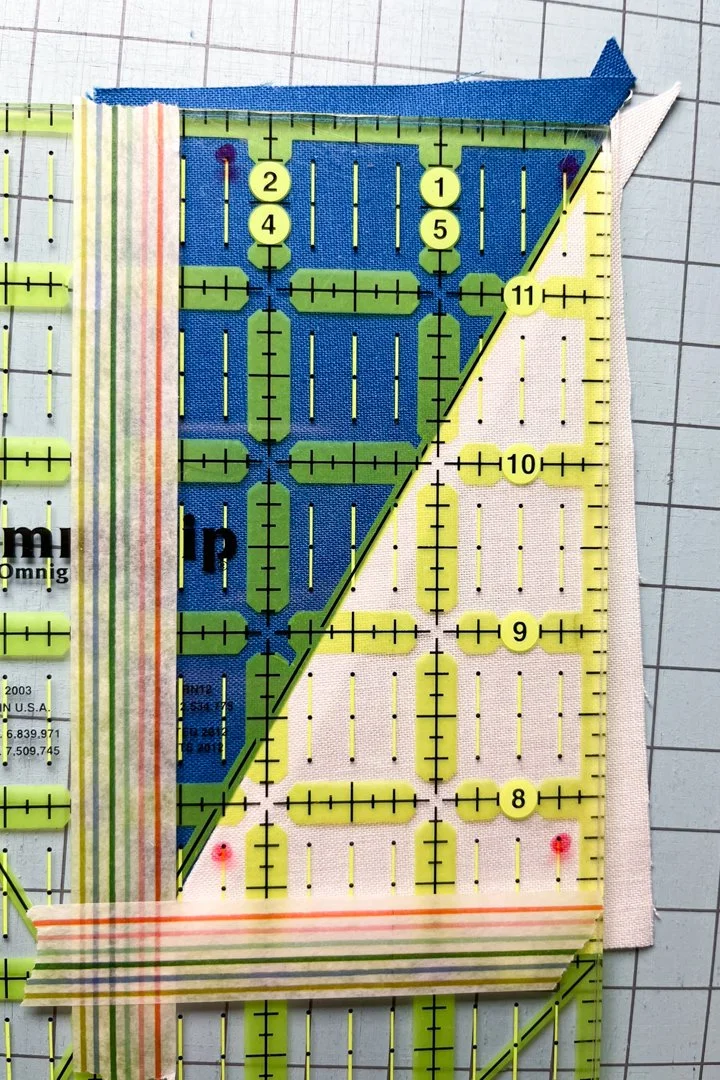
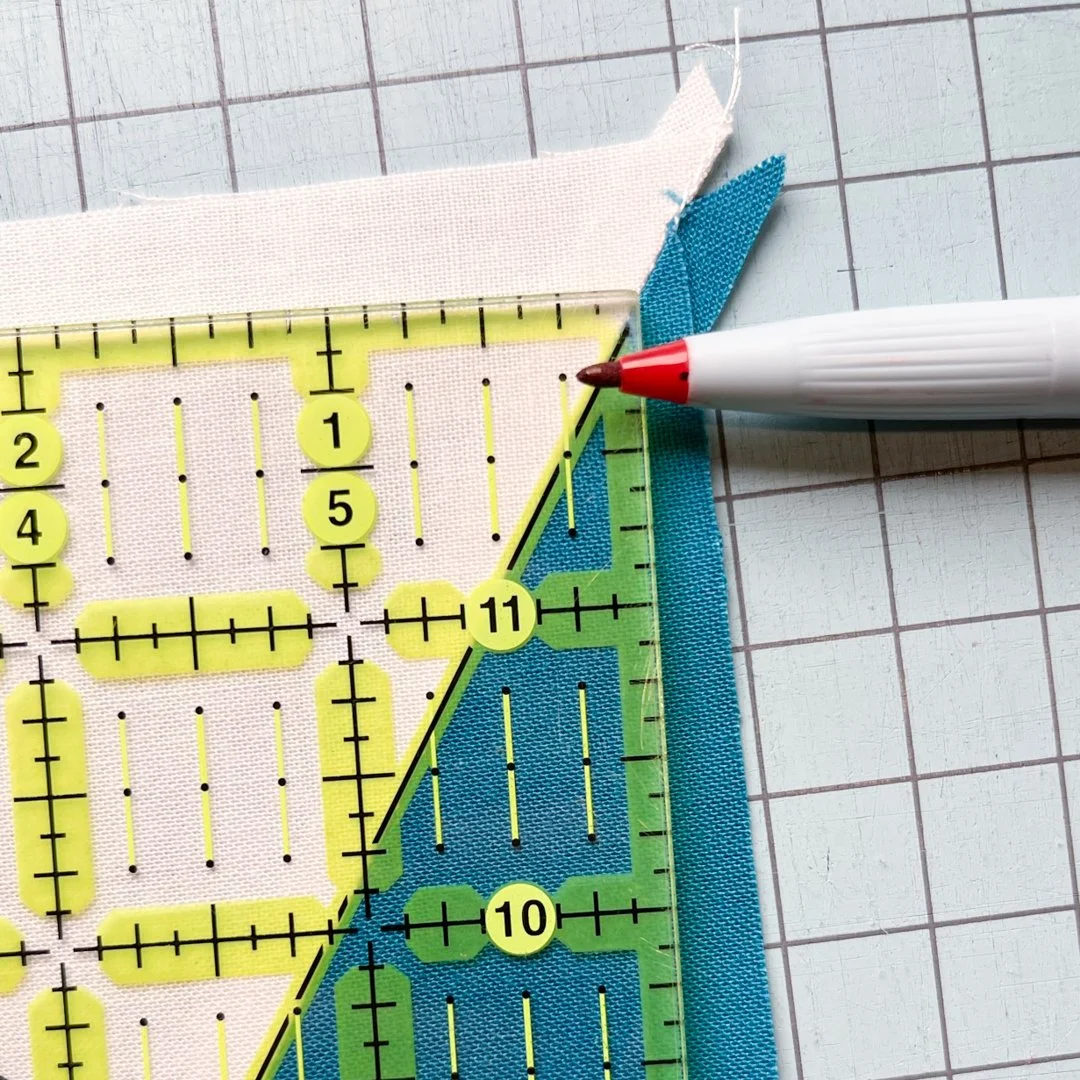
And it’s a simple fix! A slight shift of your quilter’s ruler (clockwise, in the example photos) so that the ¼” alignment marks fall exactly on the HRT diagonal seam will do the trick.
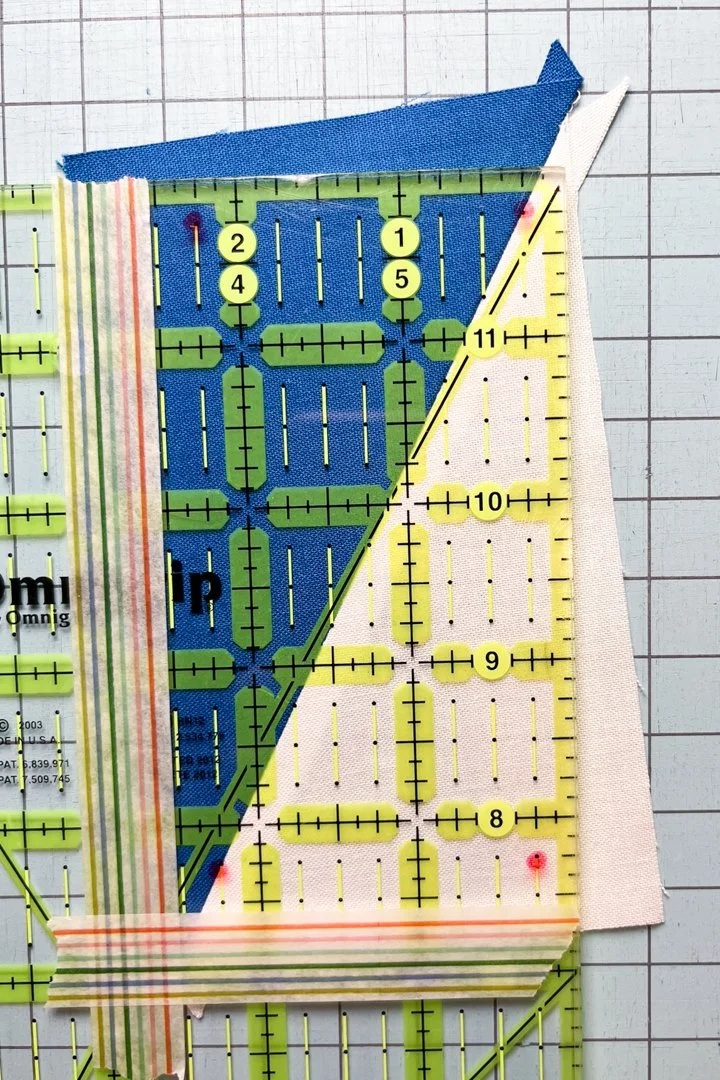
Go ahead and trim the two sides of the HRT. Then flip the HRT around so that the trimmed sides match the 2.5” x 4.5” tape marks, double-check that the ¼” alignment marks once more fall on the HRT seam, and trim the final two sides of the HRT. Trim your second HRT with the diagonal in the same direction in the same way.
Use the opposite marked corners of your quilter’s ruler to trim the second set of two HRTs (with the diagonal in the opposite direction from the first set). Once trimmed, you’ll have (4) total half rectangle triangles, (2) in each direction.
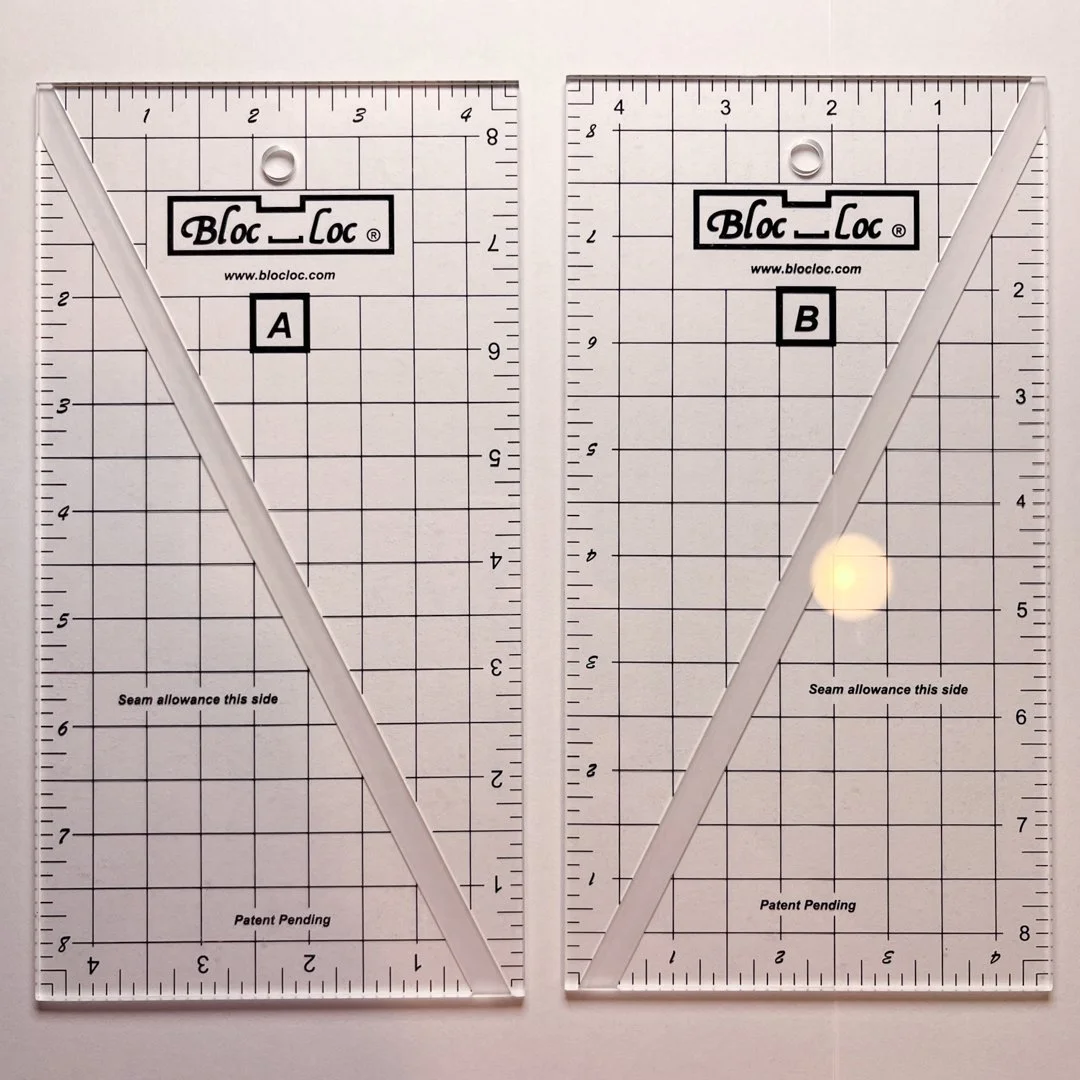
TRIMMING WITH BLOC LOC HALF RECTANGLE TRIANGLE RULERS
Trimming with Bloc-Loc half rectangle triangle rulers is a little bit different from using a quilter’s ruler, but is suuuuper-easy with a little practice! The advantage to the Bloc-Loc Half Rectangle Triangle rulers is that they already have the seam line marked on them in the correct alignment points. Let me show you how they work!
Bloc-Loc HRT rulers come with both an A and a B ruler so that you can trim HRTs in both directions. My example photos are with the B ruler. (Follow the same directions for A, but in the opposite direction!)
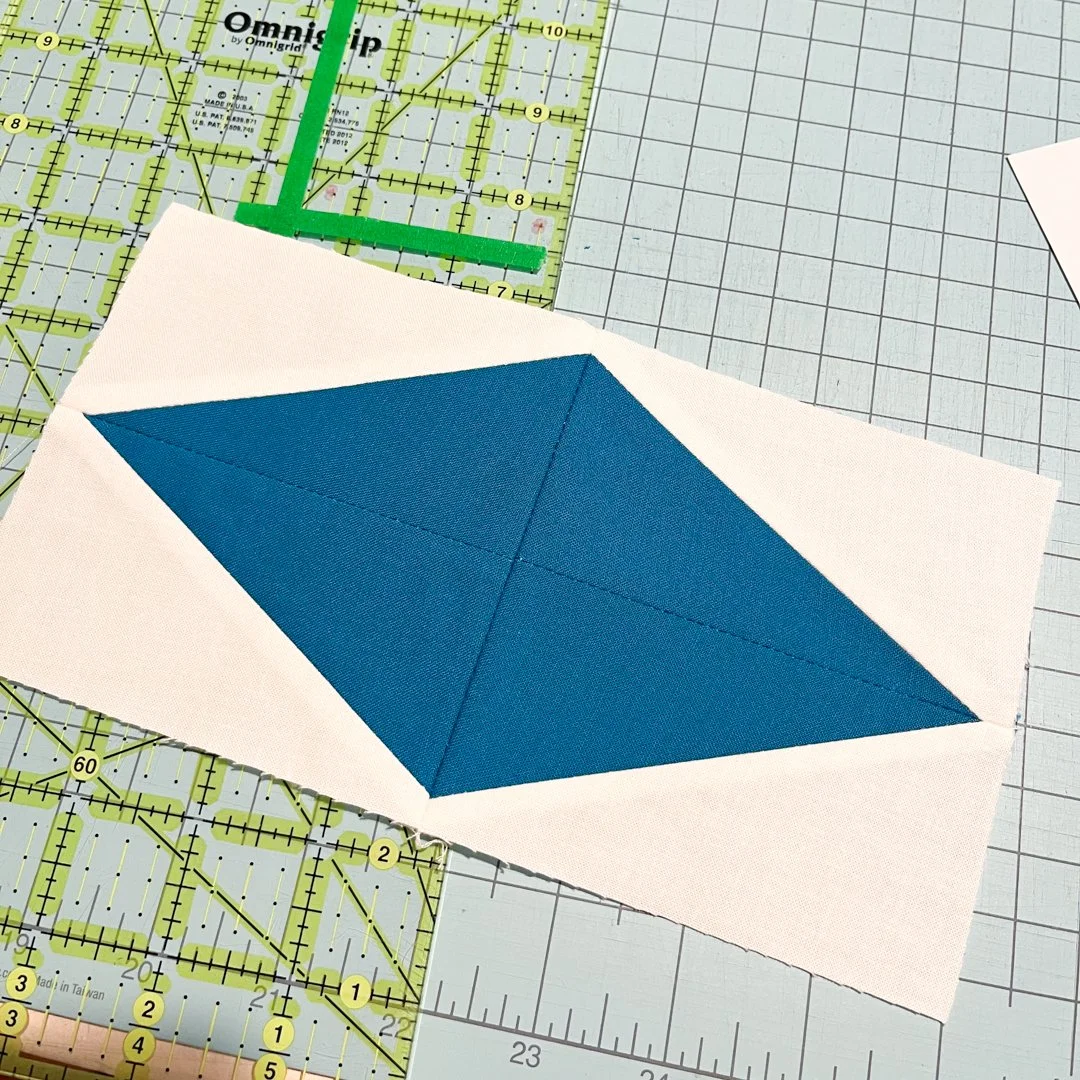
First, line up the top right corner of your Bloc-Loc diagonal line with the diagonal seam of your HRT unit. You will see where the seam does not meet the corner of the ruler exactly, and that’s perfect! Trim the top and right sides of your HRT.
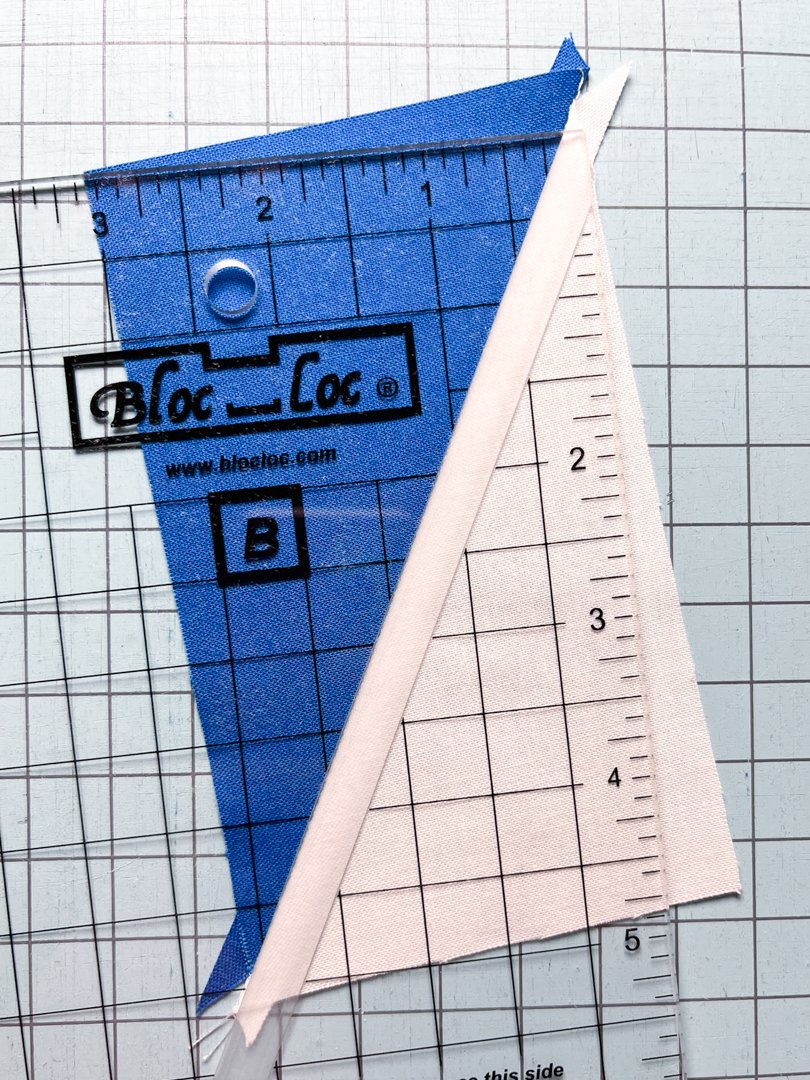
Next, flip your fabric and ruler around (you can use a rotating cutting mat, if you prefer) so the corner that was originally on the top right (trimmed in the previous paragraph) is now at the bottom left and simply slide your ruler down - right along the seam line - so that the trimmed edges of your HRT line up with the 2.5” and 4.5” marks on your Bloc-Loc HRT ruler. Trim the edges again, and you’ve got a perfect HRT!
A helpful video from Bloc Loc can also be found here.
USING HALF RECTANGLE TRIANGLES IN QUILT PATTERNS
You can use the half rectangle triangle in a variety of patterns, from the Crystal Rose quilt pattern to the Cultivating quilt pattern from Lifting Limits Quilting. Simply adjust your 1/4” alignment marks and tape as needed for the size of HRT specified in your pattern. There are so many fun quilt patterns to use this half rectangle triangle tutorial for.
And that’s a wrap on half rectangle triangles! I hope you found this helpful and that you’ll try them out on the Crystal Rose quilt pattern! Whether you make the baby size, throw size, or twin size, you’re sure to be an expert on HRTs once you’ve finished your quilt.
If this tutorial was helpful for you, head on over to Instagram to send me a DM or drop me a quick note to let me know how half rectangle triangles go for you. I’d love to hear from you!
Don’t miss out!
Sign up for the Wild Plum Lane newsletter to receive your FREE Quilter’s Weekly Planner printable and stay organized as you plan to quilt!